-
ElasticSearch 무작정 시도해보기 (with. django)ElasticSearch 2021. 5. 30. 14:20
서론
다른걸 공부하던중 ElasticSearch가 자꾸 보여서 한번 공부해보는 페이지 입니다.
필자는 ElasticSearch를 처음 시도합니다. docs를 거의 읽지 않고 구글링한 코드들을 짜집기 한 것입니다.
필자의 시도했던 순서대로 설명글이 진행되므로 다른 방법이 있을 수 있습니다.
필자의 낮은 실력으로 이해했던 내용이므로 뇌피셜이 포함된 글입니다.
Window 운영체제 기반으로 설명된 글 입니다.
ElasticSearch 준비
https://www.elastic.co/kr/downloads/elasticsearch
Download Elasticsearch Free | Get Started Now | Elastic
Download Elasticsearch or the complete Elastic Stack (formerly ELK stack) for free and start searching and analyzing in minutes with Elastic.
www.elastic.co
위의 링크에서 다운받고 C에 압축을 풀어둡시다.
한글분석기 nori 설치
압축 푼 elastcisearch의 bin폴더 경로의 cmd창을 켠 후 다음 명령어를 입력합니다.
elasticsearch-plugin install analysis-nori
ElasticSearch에 예시로 사용할 데이터셋
아래의 Dataset Search 사용하여 아무거나 가져왔습니다.
필자는 한국민족문화대백과사전을 가져왔습니다.
단 필요한 타입은 json 형태이므로 데이터를 json으로 가공하는 과정이 필요합니다.
https://datasetsearch.research.google.com/
Dataset Search
datasetsearch.research.google.com
elasticsearch 실행
명령어로 실행하거나 백그라운드, 서비스 자동 시작 명령어도 있으나 여기에서는 그냥 프로그램 키는 방법으로 진행하겠습니다.
elasticsearch/bin/elasticsearch.bat 실행
Django 설치
검색 기능을 활용할 django, restframework, elasticsearch를 설치합시다.
pip install django
pip install djangorestframework
pip install elasticsearchdjango 프로젝트 search_project 생성
django-admin startproject search_project
검색기능으로 활용할 django search_app 생성
python manage.py startapp search_app
그 후 settings.py에 등록 해둡시다.
# settings.py

INSTALLED_APPS = [
...
'search_app',
'rest_framework',
]
bulk 파일 만들기
elasticsearch 에서의 bulk는 데이터를 Post 또는 Put을 하는 행위입니다.
search_app에 적용할 내용이니 search_app에 setting_bulk.py를 만듭니다.
# search_app/setting_bulk.py

from elasticsearch import Elasticsearch
import json
es = Elasticsearch(hosts='localhost', port=9200)
if es.indices.exists(index='dictionary'):
    pass
else:
    es.indices.create(
        index='dictionary',
        body={
            "settings": {
                "index": {
                    "analysis": {
                        "analyzer": {
                            "my_analyzer": {
                                "type": "custom",
                                "tokenizer": "nori_tokenizer"
                            }
                        }
                    }
                }
            },
            "mappings": {
                    "properties": {
                        "id": {
                            "type": "long"
                        },
                        "title": {
                            "type": "text",
                            "analyzer": "my_analyzer"
                        },
                        "keyword": {
                            "type": "text",
                            "analyzer": "my_analyzer"
                        },
                        "field": {
                            "type": "text",
                            "analyzer": "my_analyzer"
                        },
                        "type": {
                            "type": "text",
                            "analyzer": "my_analyzer"
                        },
                    }
            }
        }
    )


with open("dictionary_data.json", encoding='utf-8') as json_file:
    json_data = json.loads(json_file.read())

body = ""
for i in json_data:
    body = body + json.dumps({"index": {"_index": "dictionary"}}) + '\n'
    body = body + json.dumps(i, ensure_ascii=False) + '\n'

es.bulk(body)
코드 내용대로 설명을 하자면
dictionary 라는 인덱스 주소를 만들고 한글분석기 nori를 지정합니다.
mapping은 elasticsearch에 적용할 속성들을 넣습니다.
그리고 json 형태로 불러온 데이터셋을 읽어와서 아래와 같은 형태로 만들어집니다.
만들어진 예시
{"index": {"_index": "dictionary"}}
{"id": "1", "title": "가계", "keyworld": "", "field": "사회/가족", "type": "개념용어"}그후 es.bulk(body)로 데이터를 집어넣습니다.
주의사항 dictionary라는 index가 이미 생성되었다면 다시 생성되지않습니다.
그 땐 index 지우고 다시 데이터를 넣어야 합니다.
지우는 방법
더보기콘솔창에 다음 명령어 실행
curl -XDELETE localhost:9200/dictionary
다음 명령어를 실행하여 elasticsearch에 dataset을 import합니다.
** curl로 데이터 import 하는 방법도 있는데 여기서는 다루지 않습니다.
python setting_bulk.py
API View 만들기
elasticsearch에 데이터까지 넣어줬으니 API View를 봅시다.
# views.py

from rest_framework.views import APIView
from rest_framework.response import Response
from rest_framework import status

from elasticsearch import Elasticsearch


class SearchView(APIView):

    def get(self, request):
        es = Elasticsearch(hosts='localhost',port=9200)

        # 검색어
        search_word = request.query_params.get('search')

        if not search_word:
            return Response(status=status.HTTP_400_BAD_REQUEST, data={'message': 'search word param is missing'})
        docs = es.search(index='dictionary',
                         body={
                             "query": {
                                 "multi_match": {
                                     "query": search_word,
                                     "fields": ["title", "keyword", "field", "type"]
                                 }
                             }
                         })

        data_list = docs['hits']

        return Response(data_list)
search 라는 query로 검색어를 받고 없으면 400코드, 있으면 dictionary에서 검색을 하는 코드입니다.
search_app urls.py
SearchView 만들었으니 url을 지정해줍시다.
# search_app/urls.py

from django.urls import path
from search_app import views

urlpatterns = [
    path('', views.SearchView.as_view()),
]
search_project urls.py
search_app url include 해줍시다.
# search_project/urls.py

urlpatterns = [
    path('admin/', admin.site.urls),
    path('', include('search_app.urls')),
]
실행 및 결과창
실행
python manage.py runserver
(http://127.0.0.1:8000/?search=ㄱ) 로 접속하여 결과창을 확인 해봅시다.
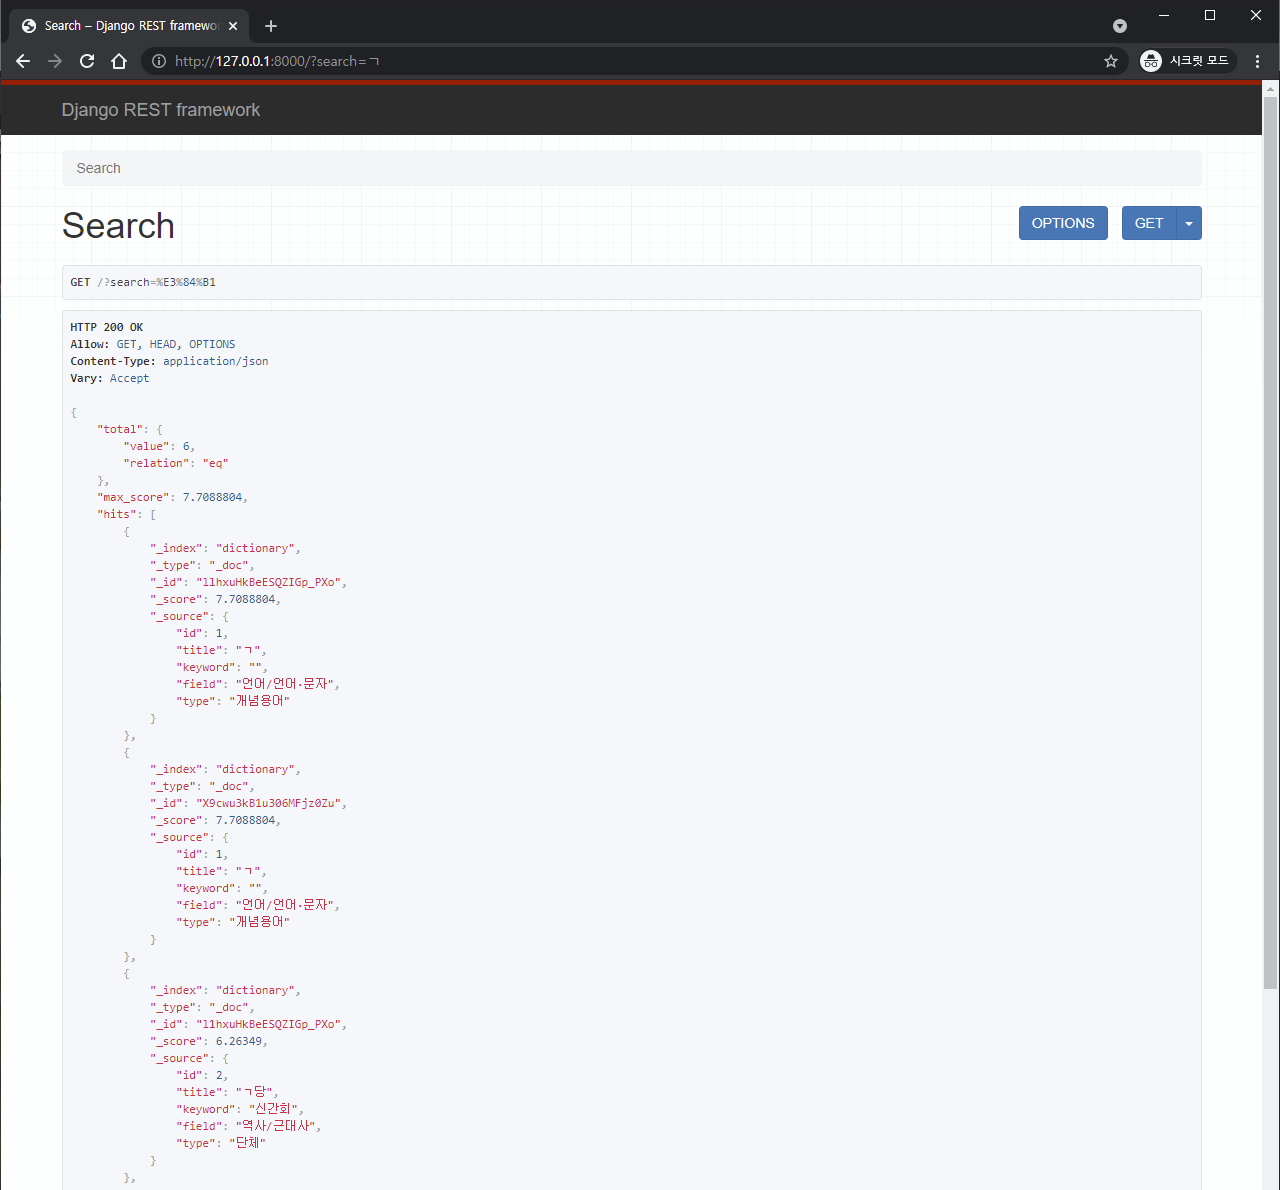
와 잘뜬다! index가 무엇인지, 검색 결과에 가장 근접한 내용이 무엇인지 보여줍니다.
마치며(회고록)
elasticsearch7 부터는 mapping 부분에 type 지정이 없어졌습니다.
필자는 왜 에러가 나는지 몰라서 한참을 찾았습니다 :(
curl로 데이터셋 import하는 문제
curl로 데이터를 import를 시도 해봤는데 왜 그런지 모르겠지만 Content-Type이 고정이 되어서 바뀌지 않아서
bulk.py를 통해 데이터셋을 올렸습니다...
다음 글은 활용 방안이나 근본적인 기초 내용 또는 kibana 활용방안에 대하여 포스팅하겠습니다.
참조
elasticsearch-django
https://ariels1996.github.io/elasticsearch/elasticsearch_django_1/
https://blog.nerdfactory.ai/2019/04/29/django-elasticsearch-restframework.html
https://livetodaykono.tistory.com/64
elasticsearch 명령어, 쿼리
https://lovekmg.github.io/2018/10/11/elasticsearch-1/#index-mapping
https://stackoverflow.com/questions/8829468/elasticsearch-query-to-return-all-records